
Course Outline
3. Personalising GuideConnect
Overview
Welcome to lesson 3 of 5 in the GuideConnect for Assessors Course.
In this lesson you will learn about the common settings people like to adjust when first using GuideConnect.
Lesson objectives
After studying this lesson, you will be able to:
- Correctly name the Main menu option that enables you to change GuideConnect settings.
- Correctly state the common appearance settings people like to change in GuideConnect.
- Correctly state the common speech parameters people like to change in GuideConnect.
This lesson should take no more than fifteen minutes to complete.
Popular settings
As discussed in the previous lesson, you can adjust some of GuideConnect settings with keyboard commands, touchscreen gestures, and through buttons on the Dolphin Remote.
You can also make these, and many other, changes through the Settings menu in GuideConnect.
Appearance
You can change many of the visual aspects of the GuideConnect user interface. You can do this through the "Appearance" options in the "Settings" menu. One popular change is to alter the screen colours.
To reiterate those simple steps:
- From the Main menu, select "Settings".
- Select "Appearance ".
- Select "Screen colours".
- Select an alternative theme.
There are also many other changes you can make to personalise the GuideConnect appearance.
These include:
- Text font used throughout GuideConnect.
- Cursor size and colour.
- Mouse pointer size and colour.
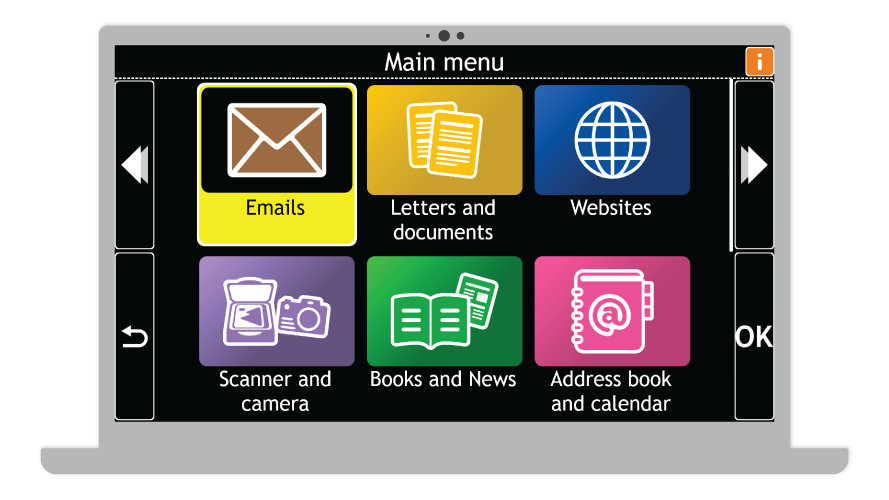
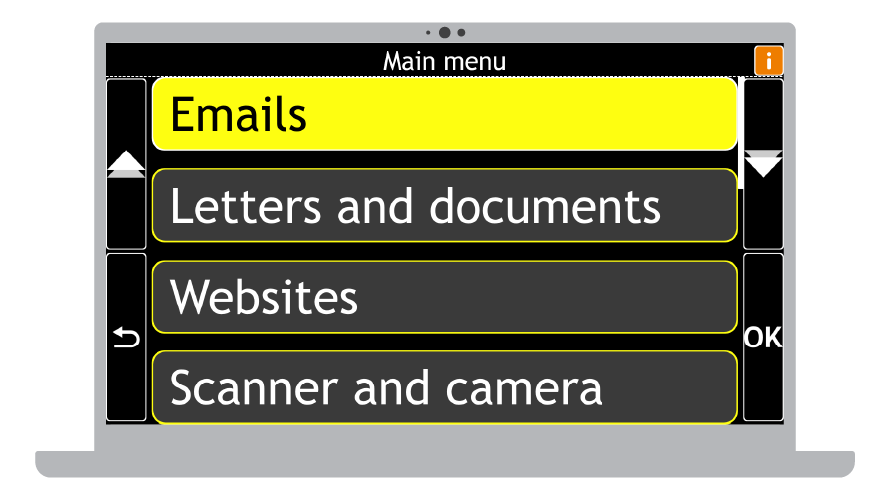
- Show menus using Tile or List View.
Tip: GuideConnect shows menu items in a Tile View when the zoom level is four or below. If you change your zoom level to five or above, you are automatically switched to List View. Turning off Tile View means you will be using List View at all zoom levels.
Tile View
List View
Speech parameters
You can change various speech parameters in GuideConnect. You can do this through the "Speech and audio” options in the "Settings" menu. One popular change is the selection of an alternative voice.
To reiterate those simple steps:
- From the Main menu, select "Settings".
- Select "Speech and audio".
- Select "Voice".
- Select a voice.
The "Speech and audio" menu also provides many other useful options including volume control, reading speed, preferred voices, how much is spoken when navigating, and what is spoken when typing.
Summary
In this lesson you learnt about the popular settings people like to adjust in GuideConnect. You learnt that GuideConnect contains all its settings within the "Settings" menu, and to adjust a setting requires just a few simple steps.
Quiz
Below are three sample quiz questions based on this lesson. Please spend no more than five minutes considering the answers to these questions.
- You can choose different screen colours through the "Appearance" options. Is this statement true?
- You can choose an alternative voice through the "Speech and audio" options. Is this statement true?
- By default, you change from Tile View to List View when you reach a zoom level of six. Is this statement true?
End of lesson
Thank you for completing this lesson. Please select 'Next Lesson' below to continue to the next part of this course.
To revisit a previous lesson, please scroll to the top of this page and choose the lesson from the Course Outline menu.
But before you move on, here are the answers to the quiz questions:
- True.
- True.
- False.
